
A house-site layout must fit the parent survey field, leave usable roads and open space, and be approvable by survey and revenue officers. The points below are the usual training norms for AP layout sketches. Local municipal / DTCP rules and current GOs override any conflict — confirm before pegging.
1. Fit the layout to the survey field
- Keep each layout inside one survey field or subdivision that matches the field shape where possible.
- If several fields are involved, amalgamate them only with proper survey authority so the layout boundary is clean.
- Do not leave large useless remnants inside the field that could have been absorbed into plots or open space.
2. Plot shape and orientation
- Prefer rectangular house sites.
- Orient plots with the long side roughly north–south and the width east–west when the site allows (standard teaching norm).
- Mark the north point clearly on every layout sheet, whatever the size.
3. Rows and roads
| Element | Typical norm (training) |
|---|---|
| Length of a row of house sites | Not more than about 5 chains / 100 m |
| Internal by-lane | About 30 links / 6 m |
| Approach road to main road | About 50 links / 10 m |
Choose road pattern so every plot has access and the main approach matches the adjoining public road.
4. Area allocation (planning check)
A common training split of the layout extent is:
- ~60% — house sites
- ~10% — community / open space
- ~30% — roads
Place community open space so it actually serves residents (often near the centre, preferably with roads on all sides). Convert percentages to ground area and show them on the reference.
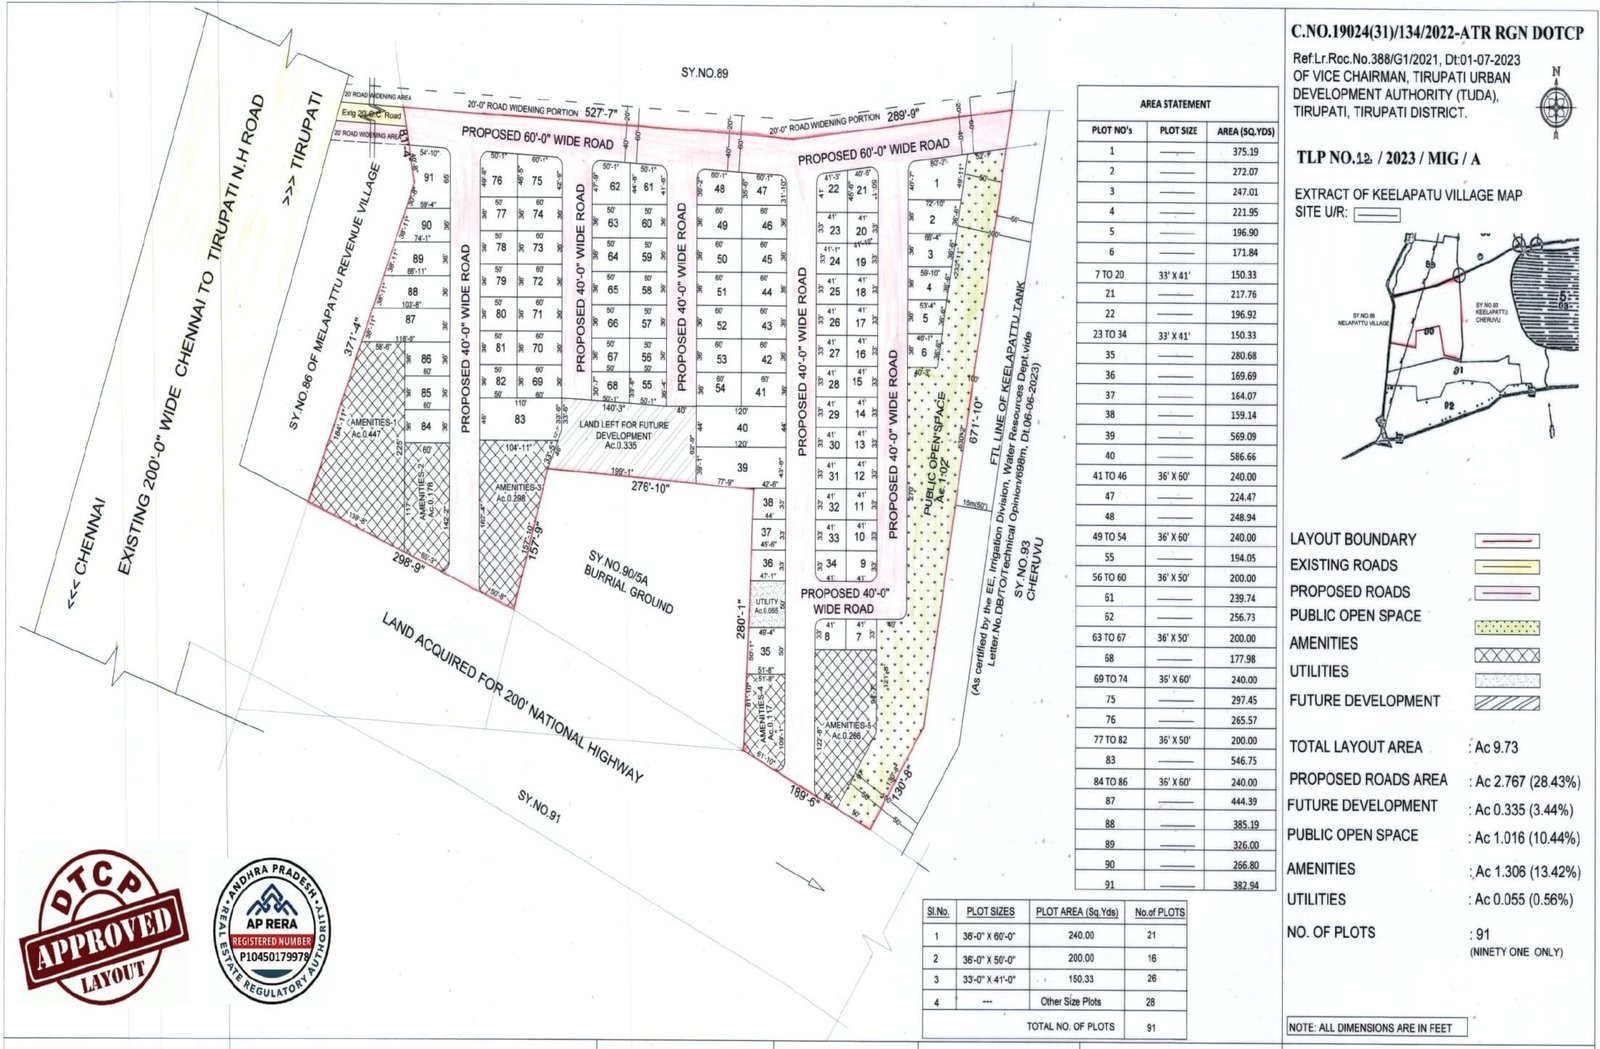
5. What the layout reference must show
- Total extent of the layout
- Plot numbers and sizes
- Road widths and road areas
- Open-space extents and purpose
- Permanent structures in or adjoining the layout (topo detail for identification)
- Parent survey number(s) / subdivision
6. Approval and pegging order
- Prepare the draft layout to scale with full reference notes.
- For layouts above about one acre, obtain approval from the Deputy Inspector of Survey and the concerned Tahsildar (or as per current local instruction) before sending higher.
- Start peg marking and plot formation only after the required approvals.
- On ground, set road lines first, then plot corners; check rectangularity and frontage.
7. Field checklist
- Parent field area matches RSR/FMB within tolerance.
- Road and open-space percentages meet the adopted norm / local rule.
- No plot is landlocked.
- North arrow, scale, and legend are complete.
Related: Dividing a plot of land · Land area calculator

Corrections & questions
These guides are maintained for practising AP surveyors. If a step is outdated or wrong, tell us — we prioritise field corrections.
Comments are not stored on this page. The report form attaches this URL automatically.